By combining my knowledge and experience of Python programming, web site construction, and basic electronics, I was able to construct a hardware device that sends OSC commands. I used a Raspberry Pi running a simple web server and listens for button presses. When a button is pressed, it sends the OSC command.
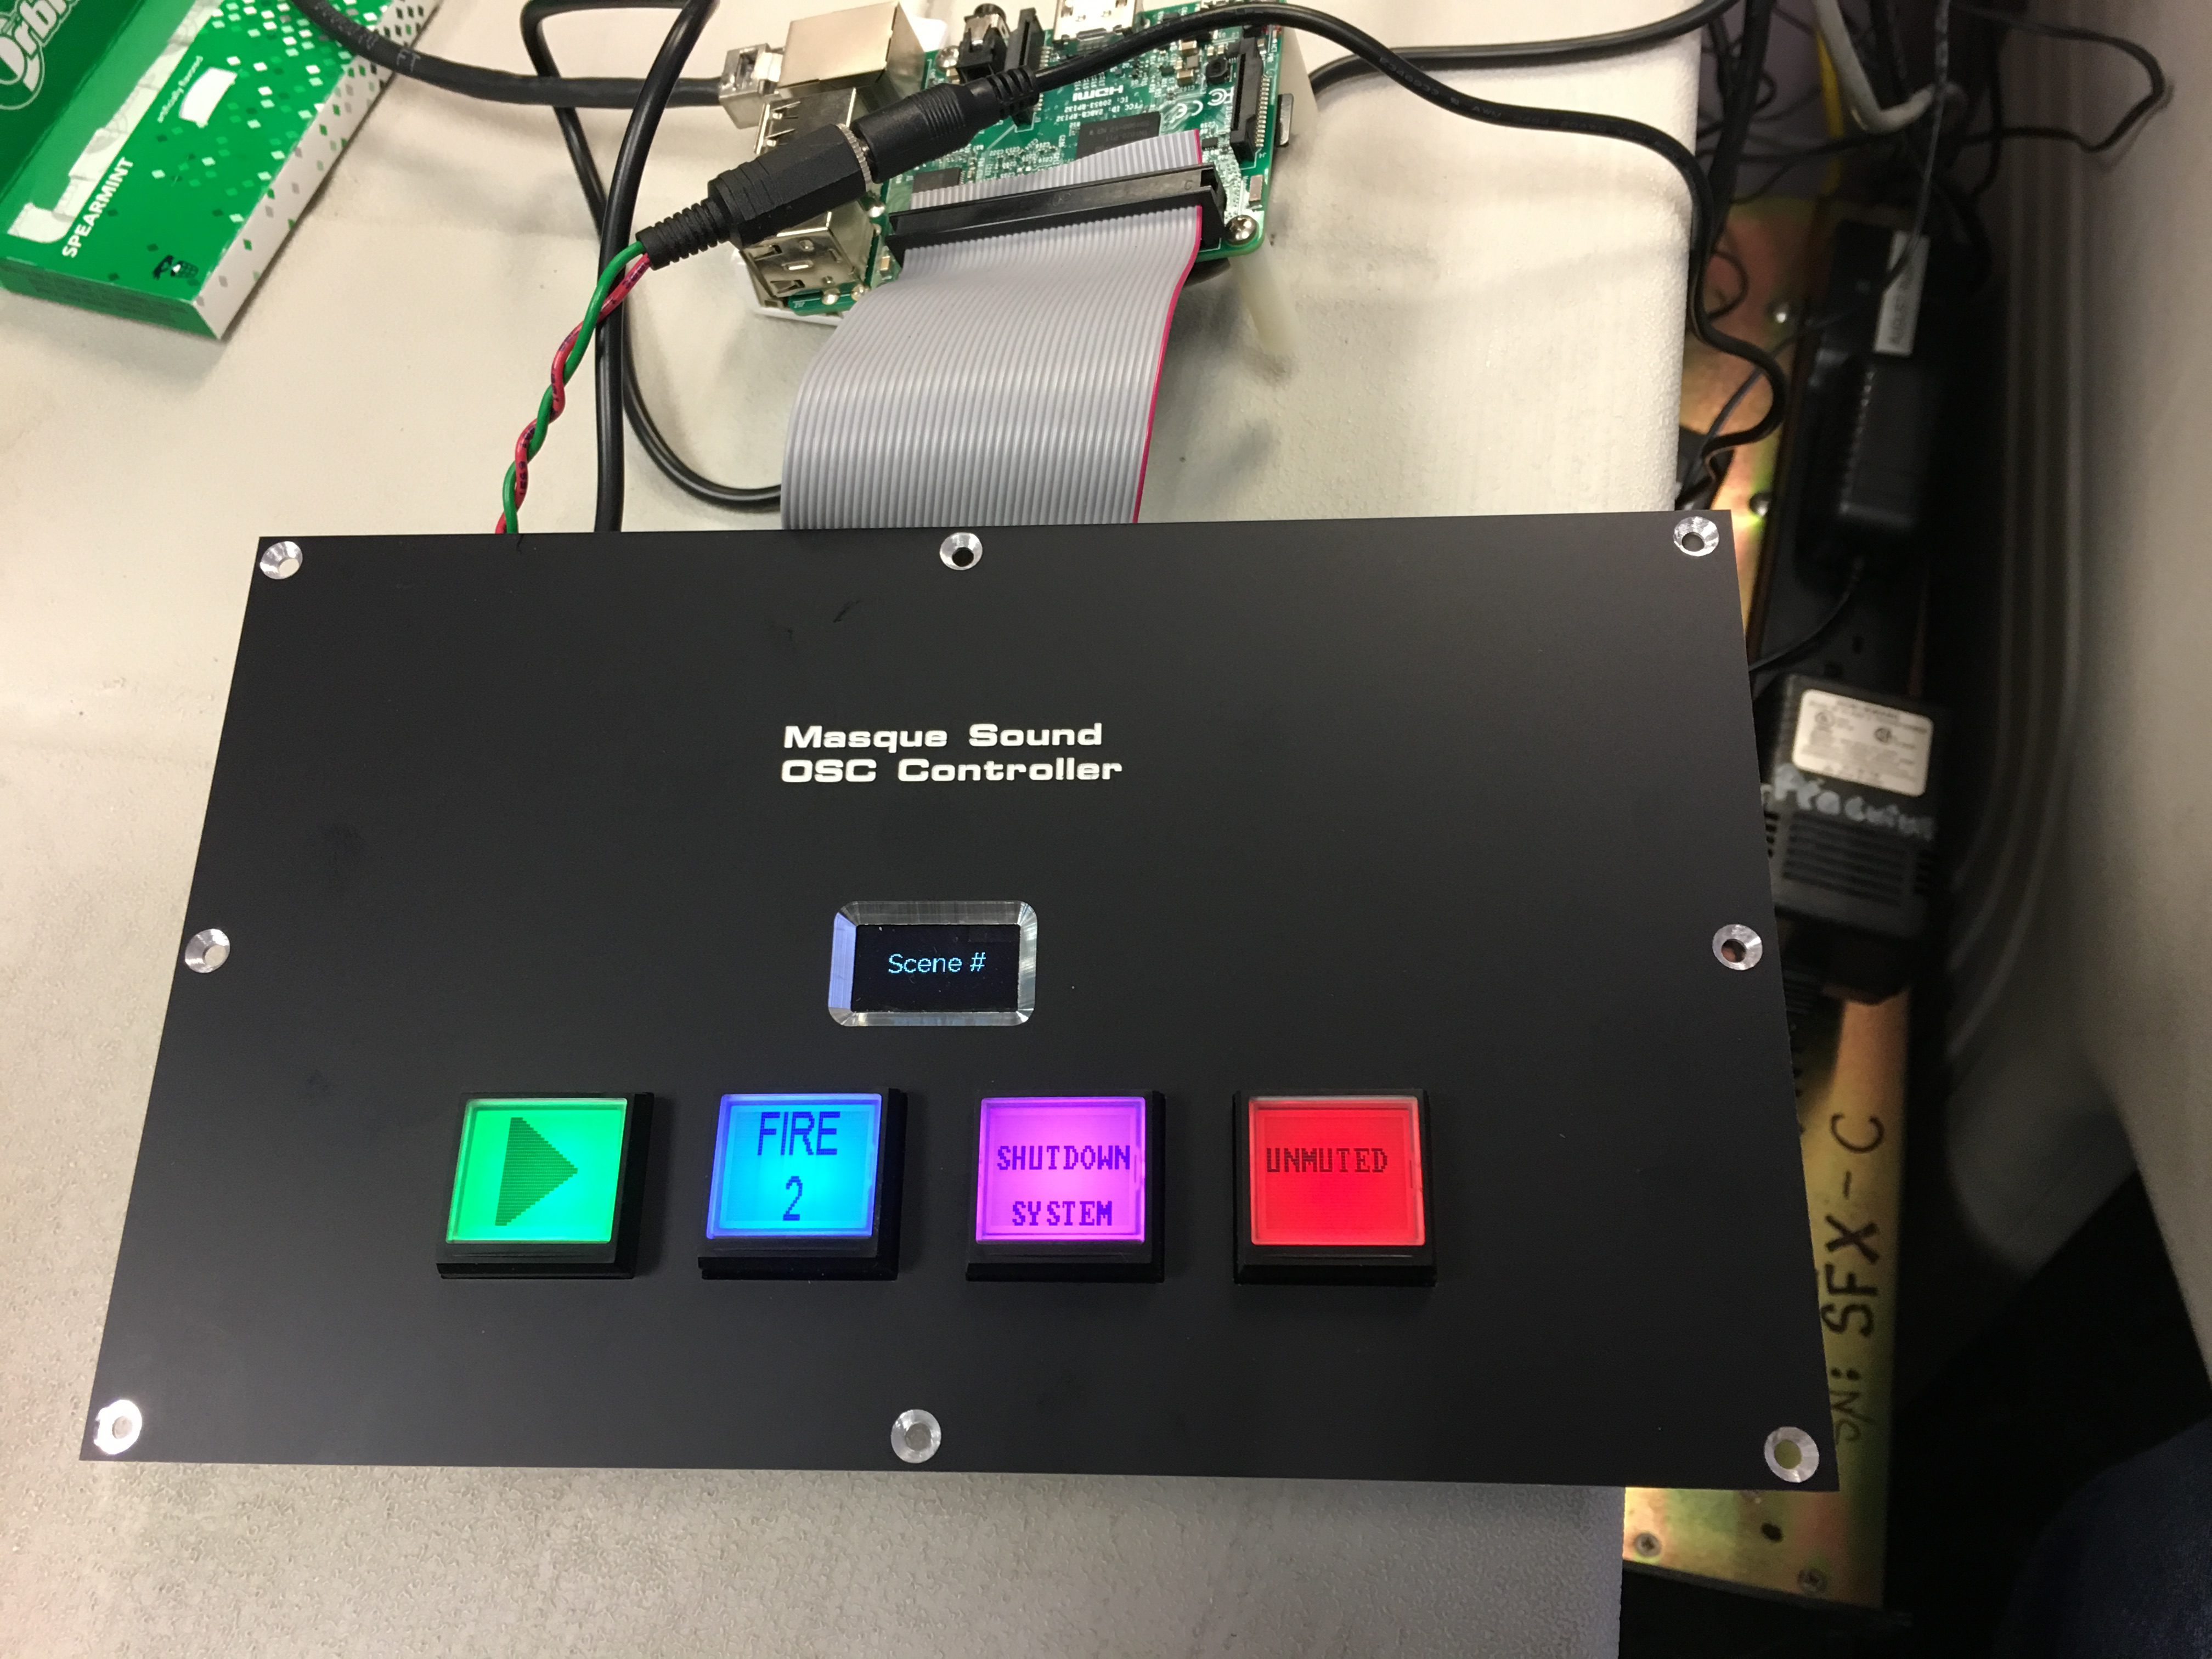
The concept is simple, a 4 button box that sends OSC commands when a button is pressed. These OSC commands are configurable with a web page that the device hosts. The first iteration of this box was used on a Broadway show to trigger a global system mute. When the button was pressed, it sent an OSC message to mute the eight Meyer Sound Galileos and change the Meyer Sound D’Mitri scene to the MUTED scene. After completing this device, I realized that it could be developed into something much more versatile.
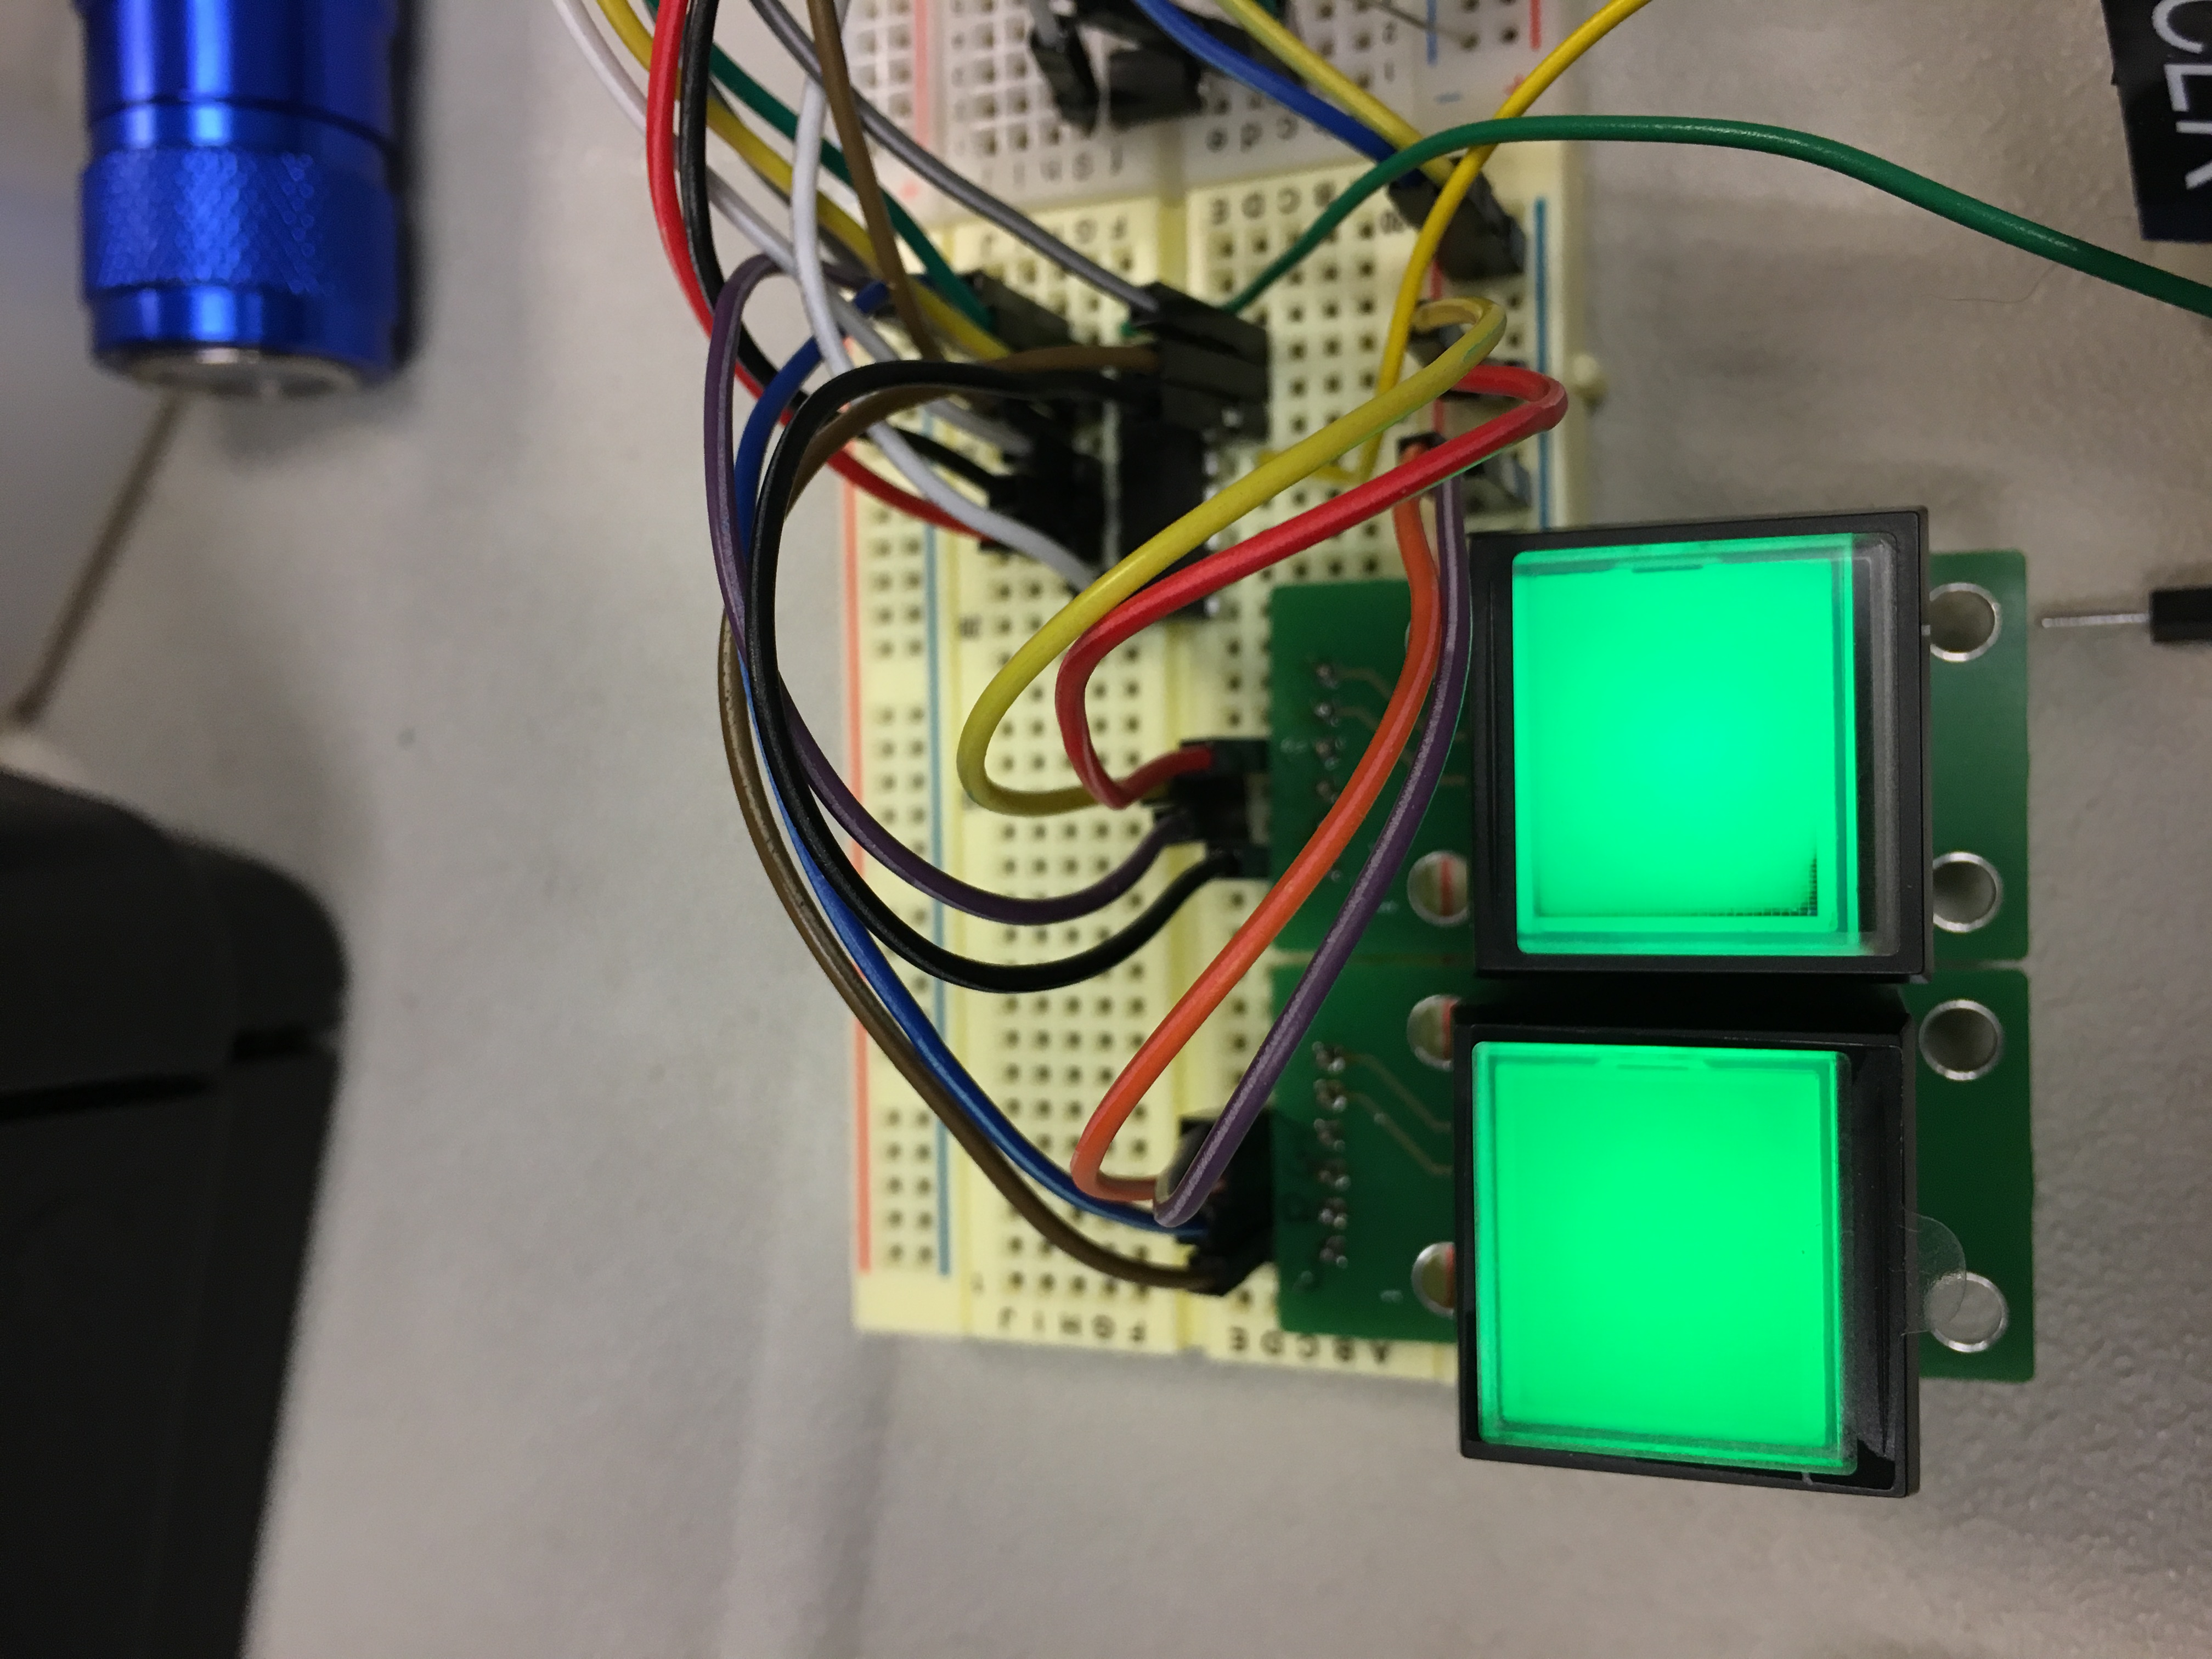
The second revision includes programmable LCD buttons, multiple scenes, OSC subscriptions and an opto-isolated General Purpose Input. Using the Q5 switch from http://www.ledswitches.co.uk/lcd-oled-products/lcd-switches/q5-lcd-switch.html was the first challenge. These amazing switches are similar to what is used on the DiGiCo sound consoles. Their specs are quite good, and they are fairly easy to use. Although it is probably not the best choice due to speed, I chose to use Python to program the switches, and through much trial and error, came up with this library. This experimental library functions well enough, but has been significantly improved in the production code.
The Q5 does not have a chip select pin, so in order to address each switch individually I multiplexed the clock signal from the Raspberry Pi. The following picture shows this in action.
Once the switches were working on a breadboard, I attempted to design a PCB for the box. I learned just enough KiCAD to design a board, and used OshPark to produce it.
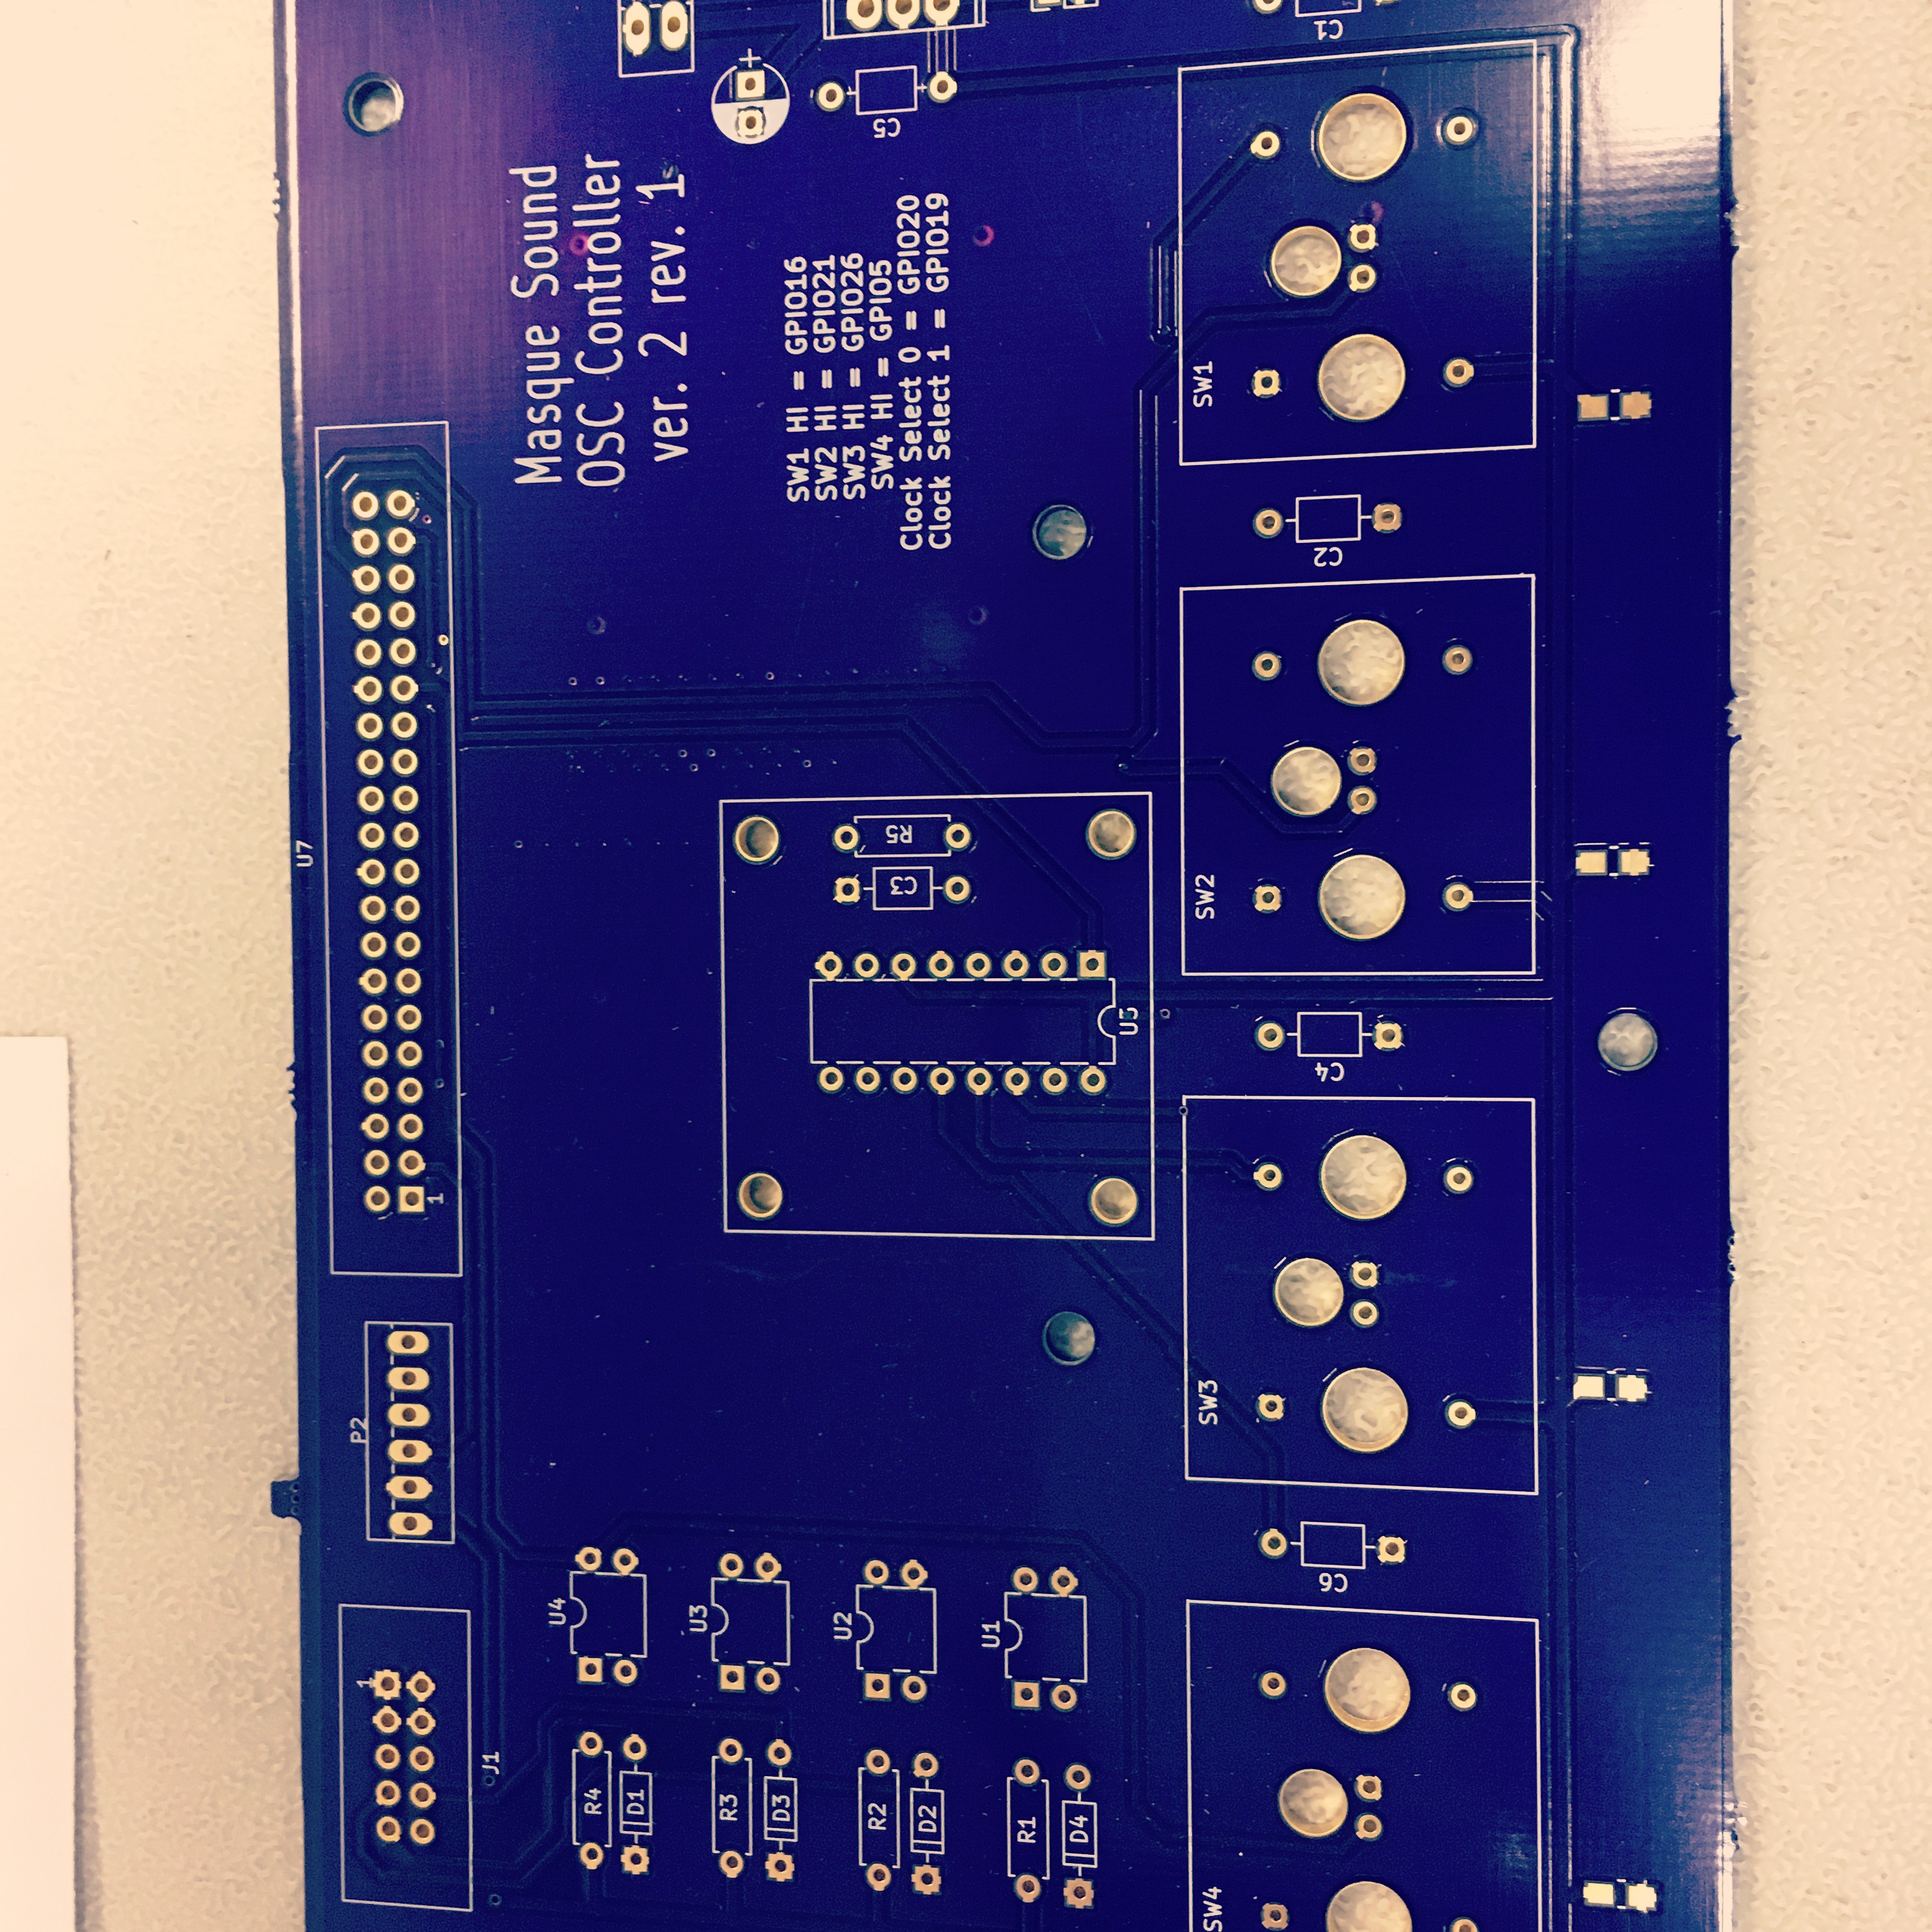
This PCB worked reasonably well, but like all first attempts, it can use some improvement. After populating this board, I designed a front panel using Front Panel Express. This allowed me to make a very professional looking front panel for this device.
Finally, Felix Kutlik helped make an enclosure to hold the PCB and the Raspberry Pi. In its current state, the OSC controller functions, but I am adding more features to it. Using the web configuration console allows changing button colors, text, OSC messages, confirmation messages, etc.